Tutorial - How to Alter the Bottom Cup Depth of a Multi-Piece Bra Cup
Learn how to alter the Bottom Cup Depth (while keeping the width) of a bra cup! While this tutorial is tailored for the Labellum, it can be used for ANY pattern with a multi-piece bra cup including the Lanai Wireless.
That said, we wanted to cover ONE method of increasing/decreasing the bottom cup depth (BCD) of the cups in detail and utilizing the “Layers” option in Adobe Reader. For those who are not aware, Adobe Reader is a FREE PDF Reader that is a bit more robust. The ability to turn on/off different sizes and/or seam allowance can make grading and customizing easier. While this tutorial was written for the Labellum specifically, the methods can be applied to any multi-pieced bra cup.
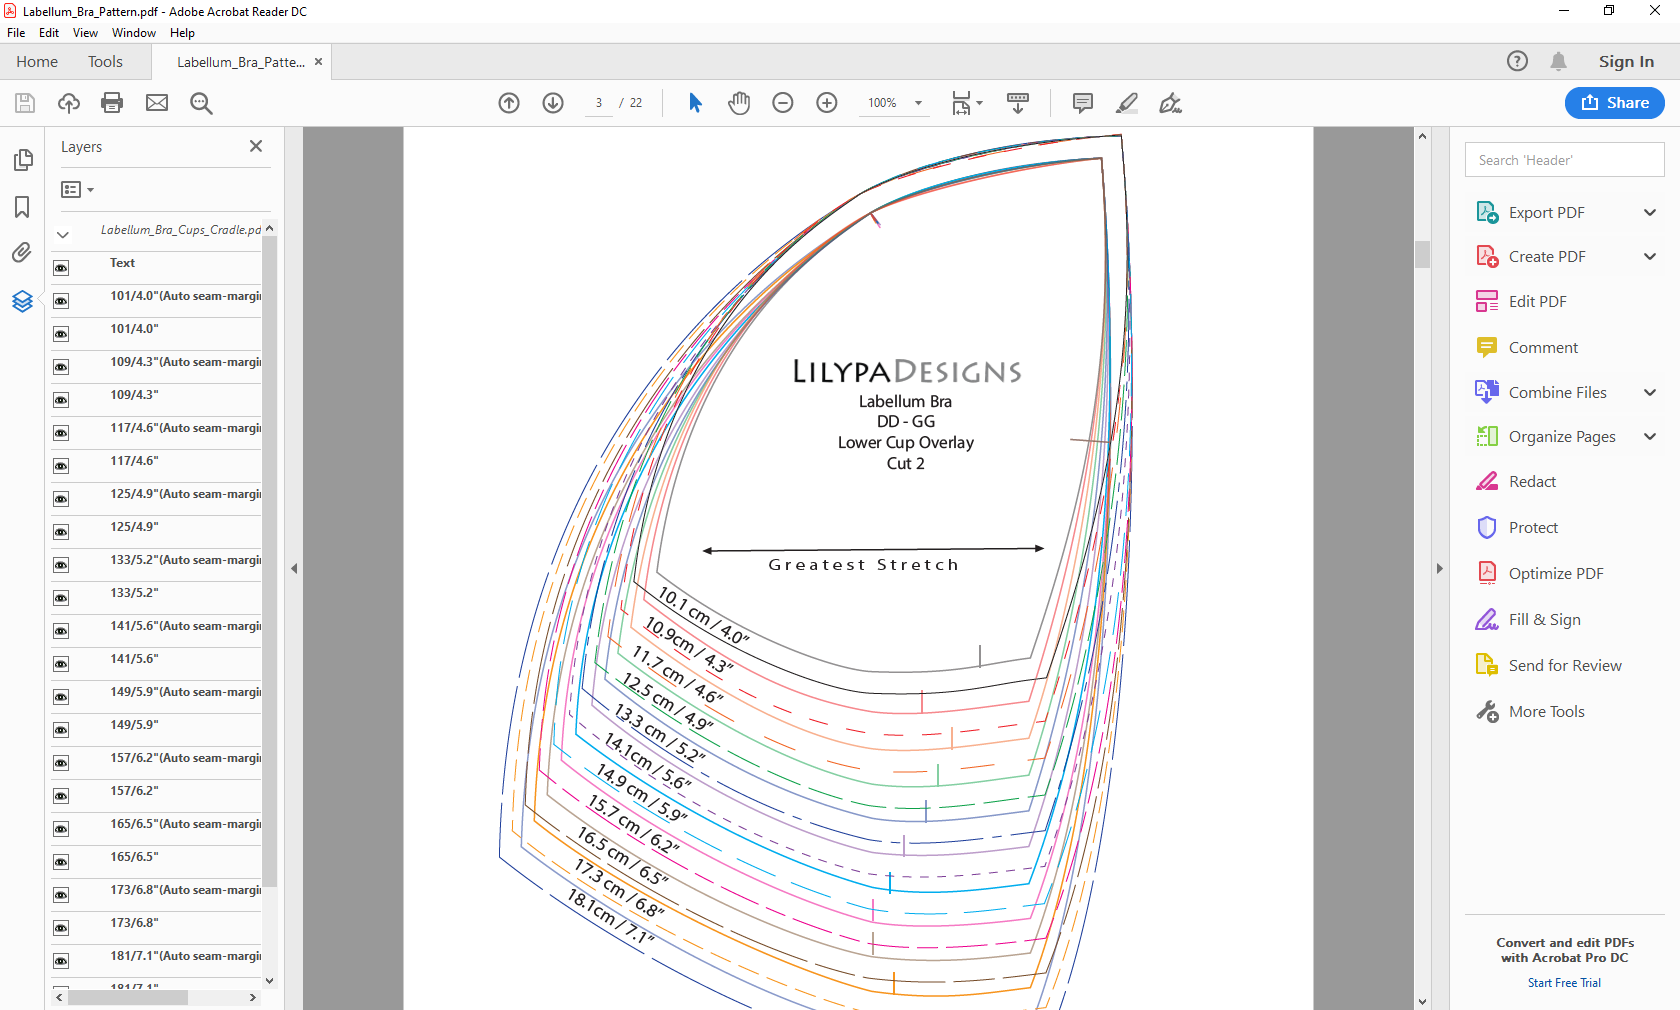
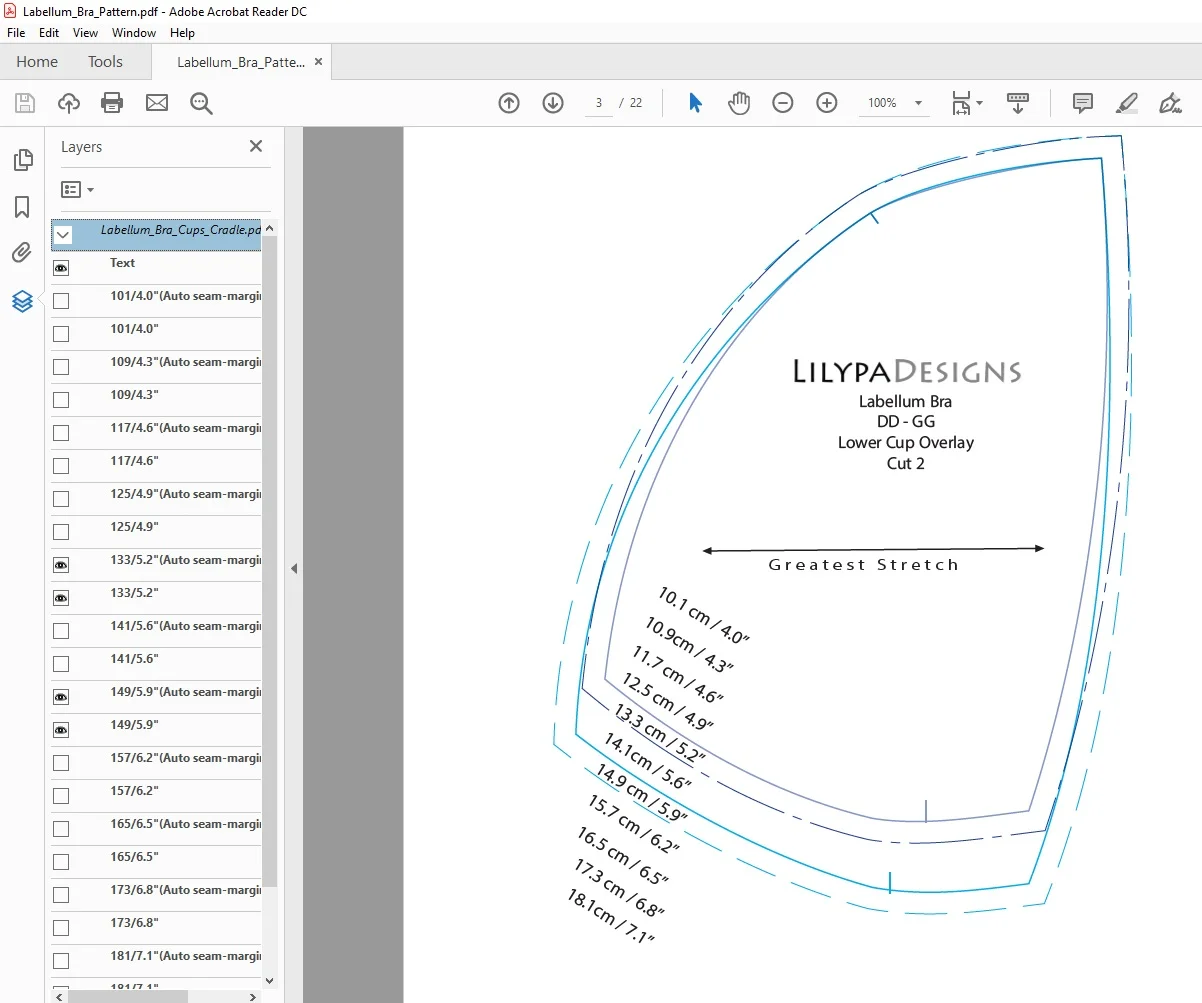
Here’s what it looks like as is. You will notice there are ALOT of lines. On the far left hand side, you will see an icon that looks like a stack of papers. Click on it and it will open up the layers.
If you click on the box before each size, it will turn on/off that size. Each size has 2 entries - one for the pattern piece and one for the seam allowance.
Simply turn on the size(s) you need and print. You can also turn off the seam allowance to make adjustments and grading easier.
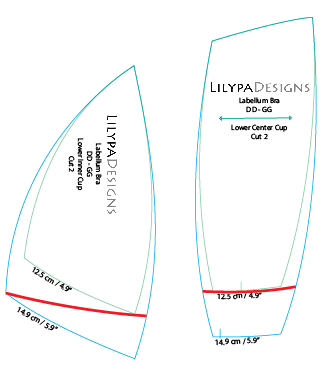
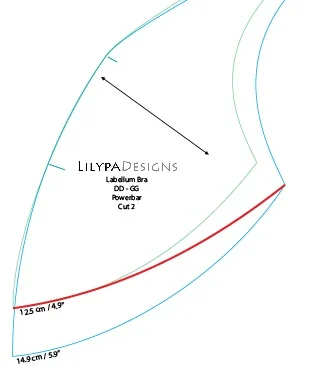
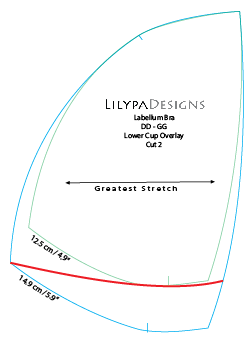
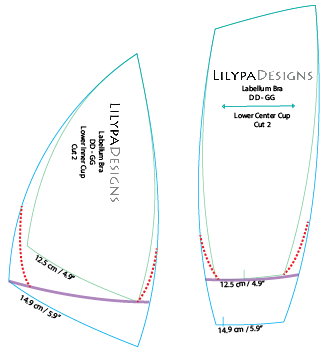
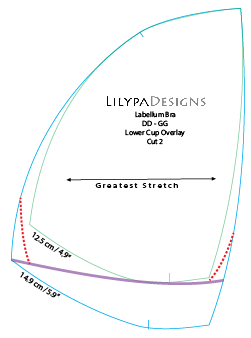
In our previous sample [HERE], Heidi’s best fitting underwire fits 13.3cm/5.2” while her Horizontal Hemisphere (HH) is 14.9cm/5.9” and BCD is 12.5cm/4.9”. This means she needs the volume of the larger HH but a shorter BCD. We can accommodate that by reducing the BCD of the 14.9cm/5.9” to 12.5cm/4.9”.
Start with the Lower Center Cup (if using) as its the easiest. Simply draw a new slightly curved line at the smallest size.
For the other cup pieces, it is important to remember we are ONLY shortening the BCD and NOT the horizontal hemisphere. In essence, only the bottom cups of wireline. The left seam of the Lower Inner Cup is part of the horizontal measurement therefore, it DOES NOT change. Likewise, the lower right corner of the power bar is part of the horizontal measurement and also DOES NOT change.
You will notice there is no diagram for the upper cup - that’s because it doesn’t change!
If your BCD is LARGER than the HH, you’ll want to connect the same corner to the larger BCD in the same manner.
OMEGA SHAPE (MINOR)
In Heidi’s case, her underwire fits the 13.3cm/5.2” cradle the best and is very likely omega shaped. The cradle is also a few sizes smaller than the 14.9cm/5.9” cup we just altered. Therefore, it is unlikely our altered 14.9cm/5.9” cup’s wireline will fit the wireline of the 13.3cm/5.2” cradle. There are 2 common methods to for fitting a larger cup into a smaller cradle: gathering or adding darts.
Depending on your situation, one maybe preferable to the other. I prefer incorporating darts into the seamlines for larger size differences. This method lends itself to dart incorporation quite nicely as you will see below.
All that is left is to “walk” the altered seamlines to make sure they all match up and add the seam allowance back on!
OMEGA SHAPE (EXTREME)
If you are VERY omega shaped (6 or more size difference), you may also need to take some length out of the wireline from the neckline of the upper cup AND the powerbar as well as extending the length of the darts themselves.
In the case of an extreme omega, incorporated darts is the ONLY method recommended due to the major differences in wireline lengths of the cup vs the cradle.
EXTREME omega - major differences (in excess of 6 sizes) between the breast volume/horizontal hemisphere and the wire size may need additional alterations.
Note that the incorporated darts are longer - at least half the distance of the seam itself in the lower cups and the full length in the neckline and underarm sections.
Also note that the HH seam of the upper cup is left untouched. Too much curve at this line can create odd bulges.
This omega alteration method can be applied to any number of bra patterns using the formula:
difference (between wireline lengths) / #of seams.
As usual, true the lines before adding seam allowance back on.
SHALLOW SHAPE
If your BCD is LARGER than your HH and/or your cradle size is LARGER than your HH, you may need to ADD a bit of length to the wireline [Purple Line]. If you already made a muslin or fitting band, you can simply measure how much “more” you need to add. If not, you’ll have to measure the cup pieces and compare to the cradle pieces.
Before braking out the drafting tools, however, check to see if reducing the height of the underarm is an option. This option is unique to our patterns due to our extra tall side seams. If a height reduction works for your body, simply cut off the excess.
***If you need to reduce the BCD, below is ONE method of doing so. This happens to be my preferred method - flat drafting - simply because it suits how my brain functions. If this method doesn’t work well for your learning modality, you can try sewing up a size as-is and pinning/clipping the excess wrinkles then transfer to the pattern after.***

